Tuesday 21 January 2014

Mocha Buttercream Chocolate Espresso Cake


If just the sound of that title has you craving coffee or chocolate or cake, this post is right up your alley! That's right I made a Mocha Buttercream Chocolate Espresso Cake and mini Cupcakes!!!

Get ready! Deliciousness ahead!


Here's the recipe!

This moist espresso and chocolate flavored cake is brushed with coffee glaze and then finished with a soft mocha buttercream frosting, making every bite melt in your mouth.

Ingredients

CHOCOLATE ESPRESSO CAKE
1 bar (4 oz.) dark chocolate
2 cups all purpose flour
1 teaspoon baking soda
1/2 teaspoon salt
1 1/2 cups packed light brown sugar
1 cup (2 sticks) butter, softened
4 large eggs
2 tablespoons instant espresso powder or instant coffee granules
1 teaspoon vanilla extract
1 cup buttermilk 

MOCHA BUTTERCREAM FROSTING

    1 bar (4 oz.) dark chocolate
    2 teaspoons instant espresso powder or instant coffee granules
    3 tablespoons milk
    1 cup (2 sticks) butter, softened
    1/2 teaspoon vanilla extract
    1/8 teaspoon salt
    4 cups powdered sugar


    Directions

    FOR CHOCOLATE ESPRESSO CAKE:
    PREHEAT
    oven to 350ยบ F. Grease and line two 9-inch-round baking pans with wax paper.

    MICROWAVE chocolate in small, uncovered, microwave-safe bowl on HIGH (100%) power for 45 seconds; STIR. If pieces retain some of their original shape, microwave at additional 10- to 15-second intervals, stirring just until melted. Cool to room temperature.

    COMBINE flour, baking soda and salt in small bowl. Beat brown sugar, butter, eggs, instant coffee and vanilla extract in large mixer bowl for 3 minutes. Gradually add melted chocolate and continue beating for an additional minute. Beat flour mixture into creamed mixture alternately with buttermilk. Pour into prepared pans.

    BAKE for 33 to 38 minutes or until wooden pick inserted in center comes out clean. Cool in pans on wire racks for 10 minutes. Run knife around edges of cakes. Invert onto wire racks; remove wax paper. Cool completely.

    BRUSH Coffee Glaze over cake layers. Spread Mocha Buttercream Frosting between layers and over top and sides of cake.

    FOR MOCHA BUTTERCREAM FROSTING:
    MICROWAVE
    chocolate in small, uncovered, microwave-safe bowl on HIGH (100%) power for 45 seconds; STIR. If pieces retain some of their original shape, microwave at additional 10- to 15-second intervals, stirring just until melted. Cool to room temperature.

    DISSOLVE instant coffee in milk in glass measure. Beat butter, vanilla extract and salt in large mixer bowl for 3 minutes. Beat in melted chocolate until blended, scraping occasionally. Gradually beat in powdered sugar until light and fluffy. Beat in coffee mixture, 1 tablespoon at a time, until desired spreading consistency.

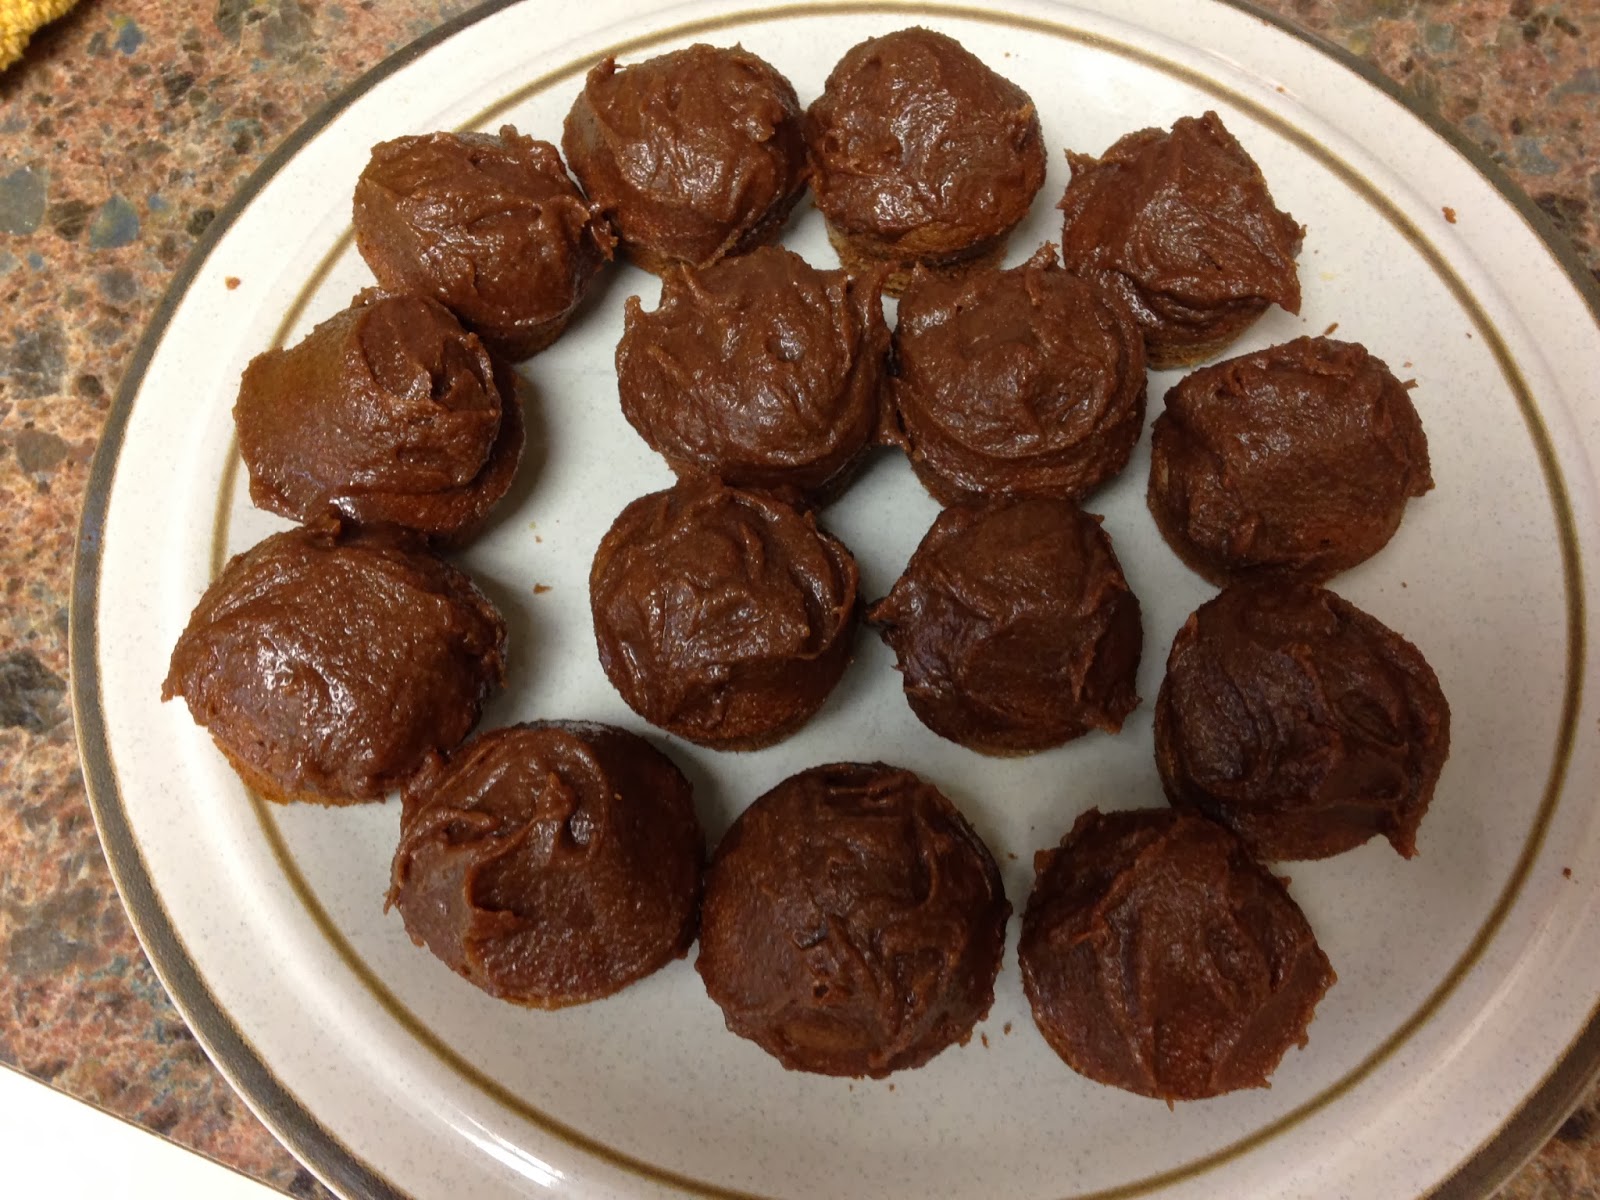
    Instead of making a layered cake, I decided to just make a single layer cake and use the extra batter for mini cupcakes which you saw at the beginning of this post. I planned to bring the mini cupcakes into lab and share with everyone I do research with, but I put the plate in front of my housemates and they were all gone before I knew it. I brought the cake back to Bryn Mawr with me, my housemate decided she wanted to wrap it up and put a bow on it. I brought the cake to Bryn Mawr and it was all gone within a day of starting it. Next time I will use powdered sugar for the frosting (I didn't have any at SERC). Though there was just the right amount of coffee and chocolate. 

    Monday 20 January 2014

    The Molecular Science Life

    I spent this past week at SERC doing molecular biology. This teeny tiny world is not one I've dealt with a lot before this week. Most of the research I've done before this week was on a more macro scale. But I'm always up for a challenge! I'm always eager to learn new things and explore new avenues of science.! Here's a few highlights of the bench work I did last week at SERC!

    When I was at Bryn Mawr, I cut 25mg of Phragmites samples into little microtubles. Then at SERC I added  300micro L of buffer RLT to each microtuble. Buffer RLT is a lysis buffer, used to lyse cells prior to DNA isolation. Lysis is the breaking down of a cell, and is especially used when one wishes to avoid dramatic forces that would denature sensitive molecules like proteins or DNA.


    The lysis helped to obtain the DNA, but then the DNA had to be purified. The picture to the right is of my purified DNA samples, with pipette tips and a box of KimWipes in the background of course! I purified the DNA through a number of specific chemicals and a machine called the BioSprint 96, set on a plant DNA protocol. There are seven different slots on the BioSprint, and I had to make sure each slot got the correct chemical in the correct amount. There was lots of double-checking with my notes and cross-referencing with the official protocol, to make sure I was doing everything as I was supposed to.

    There's the first PCR plate I did all by myself! Science is pretty as well as amazing! It's the Red PCR Master Mix that makes the wells look pink. The Red Master Mix is a pre-made mix that has all the reagents needed for PCR with a colorful inert red dye. It makes running a PCR simpler, so one does not have to add each separate chemical individually. But I do have to dilute the primer 10x, then add more water, and the Red Master Mix. PCR is short for polymerase chain reaction, it's used to amplify DNA to create thousands or even millions of copies of a particular DNA sequence - which is what the primers help to identify. Each primer is for a different sequence. We used 8 different primers, each of which had to be run as separate PCR cycle, especially because several had different annealing temperatures. 

    That's a pretty brief summary and I skipped a few steps in my summary, but this post gives y'all a view of what I've been up during the hours and hours I spent in lab at SERC while gaining new lab skills and experiencing a new corner of ecology based biology!

    Tuesday 14 January 2014

    Balsamic Roasted Potatoes

    Guess what greeted me after work today?
    A huge bag of potatoes!
    It's just like the summer where any spare food goes to the interns. Well after the potato and ice cream fundraiser, we got . . . the potatoes! A small part of me wishes it was the ice cream, but free food is appreciated and potatoes are versatile!

    I didn't want to do plain boiled potatoes and I'd just done potato wedges.
    Time to explore the vast realm of the Internet!
    That's when I struck a gold mine . . . Balsamic Roasted Potatoes!

    I made some adjustments to the original recipe because some herbs and spices were not avaliable and others were. So here's my version of the recipe.

    Ingredients
    - 2 tablespoons olive oil
    - 2-3 medium sized potatoes cut into quarters
    - 1/4 chopped onion
    - garlic powder (to taste)
    - Old Bay spice (to taste)
    - 1/8 teaspoon ground nutmeg
    - 1/4 cup balsamic vinegar
    - 3/4 teaspoon pepper
    - 1/4 teaspoon salt

    Directions
    1) Pre heat oven to 400F
    2) In a large nonstick skillet, heat the oil over medium-high heat. Add the potaoes, onion, and garlic powder, tossing and stirring to combine. Add the nutmeg. Cook and stir for 2-3 minutes or until potatoes are hot.
    3) Transfer to a large baking pan coated in nonstick spray. Bake at 400F for 25minutes or until potatoes are golden and almost tender. Toss with balsamic vinegar, salt, and pepper. Bake 5 more minutes.

    And voila! These could be the best potatoes I've ever had. They are delicious! I just love the balsamic and the spices coming together on roasted potatoes! 


    Monday 13 January 2014

    Re-Exploring the SERC Trails

     One of the parts about SERC that I've missed the most other than the people and my research, are the trails! I love to run and the trails around here are simply fabulous to explore! With gorgeous scenery too! Time to go exploring again!

    Of course, I couldn't run by wintery marshes full of Phragmites without snapping a few pictures! I love the color contrast between the sky and the dead Phragmites. But have no fear the Phrag will be back in the spring, never fear! 

    Continuing down the trail took me to the water's edge before I looped around. There's a set of wood stairs down to a tiny beach. The water is not crystal clear, but I think it's clearer than it looks because the sandy bottom murks it.

    And my favorite part of the SERC is the Connection Trail of the Java Trail. It twists and turns through the forest, with a gorgeous view of the water.

    Sunday 12 January 2014

    Mocha Fudge


     Last night, I want to do some baking, and couldn't decide what to make until I remembered the White Chocolate Cake Batter Fudge I made in July. I decided to make some fudge. It's simple! It's sweet! It's delicious! Before I could the sweet results of my labor, I had to figure out what type of fudge I would make. After spending a while perusing the internet (there's no fudge recipes in my new baking book), I decided to make some Mocha Fudge!


    Here's how to do it!

    Ingredients 
    ½ c hot water
    3 tbsp instant coffee crystals
    ½ c nonfat milk
    2 c granulated sugar
    2 tbsp butter
    3 oz dark chocolate (or ½ c dark chocolate chips)

     Instructions
    1) Line an 8”-square baking pan with foil, and lightly coat with nonstick cooking spray. 
    2) In a large pot, combine the hot water and instant coffee crystals. Cook over medium-low heat, stirring constantly, until the coffee crystals dissolve. Add the milk, sugar, butter, and dark chocolate, and continue stirring over medium-low heat until the butter and chocolate have melted. Bring to a boil, and cook for another 10-15
    minutes, stirring frequently, until a small amount becomes moldable when dropped in a glass of cold water. (It may take longer, depending on your pot and stove. If using a candy thermometer, cook until it reaches 234°F.)
    3) Remove from the heat and the burner, and allow the hot mixture to sit undisturbed for 6 minutes (or until it reaches 110°F on a candy thermometer). After 6 minutes, stir vigorously until the mixture becomes thick and creamy and lightens slightly in color. Spread into the prepared pan, and allow the fudge to cool to room temperature before slicing into 1” squares.

    These fudge pieces are basically dark chocolate and coffee. In a nutshell that means lots of caffeine! These would be so good to have during finals week. So I'll have to remake them during finals week! Making them would be a good study/writing papers break, and then I'd have caffeine to get through several late nights. 

    Good Old Bay Cooking

    Now that I'm back at SERC, I'm back to having access to a kitchen, which I love! For dinner on Friday, I started out simple with pasta, green peppers, and onions. Saturday I slept in late then started my day with scrambled eggs with Old Bay seasoning (one of the perks of Maryland) along with my Cheerios.

    For dinner on Saturday, it was an unplanned carbo-loaded meal. I made some paprika covered onions which I mixed with some pasta sauce to top my cute bow-tie pasta. I also made some homemade fries! They were seasoned with Old Bay, garlic powder, salt, and pepper, with a dash of olive oil. Put in the oven for 12 minutes, flipped, then put in for 8 more minutes. They came out lovely seasoned and crunchy! Quite yummy! Can you tell that I've missed Maryland with their Old Bay seasoning! I don't actually know what's in it, but it's delicious!

    Saturday 11 January 2014

    Back to SERC !


    I'm back at SERC for the week !
    It's so familiar yet so strange. 
    I'm back at SERC in the dead of winter. So many people from the summer are gone. The new building was completed at the end of last year. Most of the trailers are gone. The old building is being renovated. And it's still fabulous SERC !!!

    The big move into the new Mathias Lab occurred at the end of the year. Now the new building is occupied by all the labs. It's a snazzy building, very modern. The building committee are aiming to get LEED Platinum, but the remodeling of the old building has to be completed first. Doesn't the new lab look beautiful? It's hard to believe its a lab building, it looks wonderful! I can even look past the slightly-childish looking amoeba lights and the small problems that were not completely thought through on the plans, because the rest of it came together fabulously!

    Bryn Mawr Baking Endeavor Part 2 : Nutty Chocolate Clusters

    The other dessert that I made at SGA house at Bryn Mawr were Nutty Chocolate Clusters! These nutty, crispy, chocolaty bites are the perfect combination of salty and sweet.

    They are made with graham crackers, nuts, white chocolate, and drizzled with dark chocolate. I made quite a lot, the picture to the left only shows a portion of them. I love to share my baking adventures and these are no different, I took them into work and gave them to friends, though I did have a few myself, 'tis an ill cook who cannot taste one's own handiwork. And they are really easy to make too!

    Ingredients
    6 oz white chocolate
    3 1/2 oz graham crackers
    3 1/2 chopped nuts
    6 oz dark chocolate

    How to make
    1) Line a baking sheet with parchment paper. Place the white chocolate in a heatproof bowl over a pan of gently simmering water, stir until melted.
    2) Crush graham crackers in a plastic bag with a rolling pin until are small pieces. Stir the graham crackers into the melted chocolate with the chopped nuts.
    3) Place heaped teaspoons of  the mixture onto the prepared baking sheet.
    4) Chill the mixture in the fridge until set, which only takes about 10 minutes.
    5) While the mixture is cooling, melt the dark chocolate in the same fashion as the white chocolate.
    6) Remove the baking sheet from the fridge. Drizzle the clusters with the dark chocolate using a fork sweeping back and forth.

    These little clusters are great! I love nuts, but sometimes get tired of just plain nuts, so these are a great change up from my usual trail mix.  They are delicious and the perfect size for sharing! I shared these with friends at Bryn Mawr and SERC!

    Bryn Mawr Baking Endeavor Part 1 : Malted Chocolate Wedges

    On New Year's Eve, I went into Bryn Mawr town to go thrift-store shopping. I had never been to the Bryn Mawr Hospital Thift Shop before, but decided to go investigating. I found a little gem on the bottom shelf of the book selection. A baking book! A $4 book with almost 400 pages of recipes. Delicious looking recipes. I could not wait to try a few of them out. But I was at Bryn Mawr, where the dorms only have tea pantries. So I had to make a reservation at SGA house (Student Government Association), the only place on campus with a student kitchen.

     I made two desserts from my newly acquired baking book.

    The first was Malted Chocolate Wedges. I used dark chocolate instead of milk chocolate. And it has a graham cracker base.

    Ingredients
    Generous 1/3 cup butter
    2 tbsp sugar dissolved in warm water
    2 tbsp malted chocolate drink
    8 oz graham crackers
    2 3/4 dark chocolate
    2 tbsp confectioners sugar
    2 tbsp milk

    How to make
    1) Grease and flour a shallow 7 inch round cake pan.
    2) Place the butter, sugar dissolved in warm water, and malted chocolate drink in a small pan and heat gently, stirring all the time until the butter has melted and the mixture is well combined.
    3) Crush the graham crackers in a plastic bag with a rolling pin. Stir the crumbs into the chocolate mixture and  mix well.
    4)  Push the prepared mixture into the prepared pan and chill in the fridge until warm.
    5) Place dark chocolate into a small heatproof bowl with the confectioners sugar and milk. Place the bowl over a pan of gently simmering water and stir until the chocolate melts and the mixture is combined.
    6) Spread the chocolate frosting over the graham cracker base and leave to set in a pan. Using a sharp knife cut into wedges and serve.

    These little bite-sized wedges were a lovely combination of creamy chocolate and crunchy graham crackers. It was a good way to start back baking after not being able to during the semester because of academia, research, athletics, and a lack of kitchen facilities in the dorms at Bryn Mawr.