Sunday, 29 June 2014

Caramel Stuffed Sugar Cookies

Last week, in a spur of sweet cravings and baking creativity, I made some caramel stuffed sugar cookies. I've had these caramel bites sitting on my shelf in the pantry since I got them a few weeks ago because I was going to use them to make a different dessert, but never did. So I used them in cookies! Because a little extra surprise in plain sugar cookies makes them awesome cookies!

Here's how to turn plain sugar cookies into caramel surprise cookies - with caramel stuffed in the middle!


Ingredients: 
3/4 cup softened unsalted butter
3/4 cup granulated sugar
1/2 cup packed dark brown sugar
1/4 cup light corn syrup
2 teaspoons vanilla extract
1 1/2 teaspoon baking powder
1/2 teaspoon baking soda
1/2 teaspoon salt
1 egg
2 1/2 cups all purpose flour
2 cups caramel bites

Directions: 
1) Preheat oven to 375F. Line a baking sheet with parchment paper.
2) Combine the butter, granulated sugar, brown sugar, corn syrup, vanilla, baking powder, baking soda, and salt into a large mixing bowl. Beat ingredients until evenly incorporated and the mixture is light and fluffy.
3) Beat in an egg and gradually add flour to the creamed mixture.
4) Shape rounded tablespoons of dough into a ball, pressing several caramel bites into the center of each ball, be sure to cover the caramels with the dough. Place the balls on a prepared baking sheet, spacing the cookies 2-3inches apart.
5) Bake the cookies for 10-11 minutes until golden on top. Let the cookies cool for a few minutes on the baking sheet before transferring to cool completely.
Chewy Caramel Stuffed Sugar Cookies
(Makes 3 dozen, adapted from the King Arthur Flour Cookie Companion)
  • 3/4 cup (1 1/2 sticks) unsalted butter, softened
  • 3/4 cup granulated sugar
  • 1/2 cup packed dark brown sugar
  • 1/4 cup light corn syrup
  • 2 teaspoons vanilla extract
  • 1 1/2 teaspoons baking powder
  • 1/2 teaspoon baking soda
  • 1/2 teaspoon salt
  • 1 egg
  • 2 1/2 cups all purpose flour
  • 1 box Milk Duds
  • 1/2 cup coarse raw sugar
Preheat the oven to 375°F.  Line a baking sheet with parchment paper or a silicon liner.
Combine the butter, granulated sugar, brown sugar, corn syrup, vanilla, baking powder, baking soda, and salt in a large mixing bowl. Beat on medium speed until all of the ingredients are evenly incorporated and the mixture is light and fluffy. Beat in the egg.
- See more at: http://www.mykitchenaddiction.com/2011/05/caramel-stuffed-sugar-cookies/#sthash.7Warfm6N.dpuf

As the cookies bake, the caramel melts slightly spreading out a bit (not enough to become gooey though, but enough to have a chewy center!) If I were to bake these again, I would melt the caramel slightly before putting it in the cookie dough. And I would coat the cookies with brown sugar before putting them in the oven to add a little crunch to them. What would be perfect on top would be those caramel crunch sprinkles at Starbucks! Just throwing ideas out there.

Saturday, 28 June 2014

Because DATA!

This week has been busy and so fantastic at the same time! It's been busy and fantastic because of one thing: DATA!
Last weekend, I worked through the weekend - both Saturday and Sunday - to finish sampling the first set of data at one of my sites. Then on Monday I made the standards for the GC (gas chromatograph) and ran my samples. It was really exciting! As you can see in the picture to the left, I get quite excited about data, especially running my own data. This is data I took and ran myself (with some help  from the guys in my lab who know how to work the GC, but I took it all the samples all by myself!)

 Let's back up a step. So what were all these gas samples I ran on the GC?

They are methane samples. I have vegetation plots (native, Phragmites, and mixed plots) out in the marsh. There are metal collars that two guys that I'm working with put in last summer. These metal collars are hammered into the ground, leaving 10cm poking up above the soil. On top of these metal collars I place plastic, metal framed chambers which are 70 or 120cm tall. In the taller Phragmites plots, I stack 2 chambers on top of each other - in fact at one of my sites, the Phragmites is so tall this early in the season that the next time I'm out sampling, I'll be stacking 3 tall chambers! There's hole with attached tubing on the top of these chambers from which gas can be extracted using a syringe. I extract an initial gas sample and 4 subsequent samples every 30 minutes for 2 hours. I have several of these chambers running at any given time, so it's always fun to organize the timing to bop between them. It's these gas samples that are then run on a GC to give methane concentrations. After the GC runs the samples overnight (there's a robot that samples the gas from the vials for me every 8 minutes!), a program is run to spit out a bunch on numbers - giving me exciting data to explore!! Look at that color coordination and fascinating figures!

I spent Tuesday and Wednesday collecting methane flux data at my other site.


On Thursday, I had the shocking realization that the month of June was coming to a close! Where does time go?! And in order to say I took pore water data in June, I needed to get out there and take it asap! So that was my Friday, taking pore water! Having done my own I have so much more respect and understanding now for people who have several harsh words to say about collecting and running pore water samples. It's hard to collect from depths deeper than 20cm in the Phragmites plots - I was trying to collect at 20, 40, and 80cm. It smells horrible - imagine a mix between manure and rotting eggs. It's a struggle to filter! It takes so much more time than I thought it would - I went out to sample around noon, thinking I could sample, filter, and run the needed methane before 6pm. I did not finish in the lab until past 8:30pm. That was a longer than planned Friday work day. And I'm so thankful to my labmates Drew and Scott who both stayed late to help me work though my struggles and teach me how to use the old, non-automated GC! 

Monday, 23 June 2014

Chocolate and Caramel Shortbread : Millionaire's Shortbread

I'm usually so much better at updating this blog, than I have been recently! I've been busy with research. I worked both Saturday and Sunday to do research prep and to take data. As a side note about data, everyone should watch this science parody video!
It's a parody of "Get Lucky" Instead of "Up all night to get lucky" this version is "Up all night to get DATA!" I showed this video to my housemates last night after we talked about making a SERC intern parody music video!

Last week, I made Millionaire's Shortbread, which I thought was a quite well-known, but may be just a British term. Essentially it's short bread, covered in caramel, covered in chocolate. . .
Let that thought sink in for a moment.
Doesn't it sound absolutely decadent? Maybe that's why it's called Millionaire's Shortbread!
Here's the recipe! 
Ingredients
Shortbread:
2 sticks butter, plus more for preparing pans
2 cups all-purpose flour, plus more for preparing pans
2/3 cup sugar
1/2 teaspoon salt
Caramel Layer:
2 (14-ounce) cans sweetened condensed milk
2 tablespoons butter
Chocolate Topping:
3/4 pound good-quality milk chocolate
 
 
Directions
Shortbread:
Preheat the oven to 350 degrees F.
Butter 2 (8-inch) square nonstick pans and coat with flour, tapping off excess. Place the flour, sugar and salt in a food processor and pulse once. Add butter and pulse until mixture resembles peas. Press the shortbread mixture into prepared pans and bake until golden brown around the edges, about 20 minutes. Remove from the oven and let cool completely.

Caramel Layer:
In a heavy-bottomed saucepan over medium-low heat, combine the condensed milk and 2 tablespoons of butter. Slowly bring the mixture to a boil, stirring continuously. Continue stirring over the heat until mixture becomes thick and amber in color, about 15 minutes. Pour the caramel over the cooked shortbread and spread evenly using an offset spatula. Cool to room temperature.

Chocolate Topping:
In a glass bowl set over a saucepan of simmering water, melt the chocolate. Once chocolate has melted, pour it over the cooled caramel layer. Cool at room temperature for about 10 minutes, and then place in the refrigerator to cool completely, allowing chocolate to slightly harden but not get hard. Cut into 2-inch squares and enjoy, or store in an airtight container

I will be the first to admit that the chocolate was not as smooth and glossy as I wanted it to be. But they tasted delicious. Decadent is definitely a good word to use to describe these bite-sized treats! I made a big dish of Millionaire's Shortbread. I let them solidify overnight, then took them into work, offering them to everyone I know and work with. Let's just say the whole dish was gone really fast, with plenty of people asking for seconds, thirds, or more. That's what I love about baking - sharing the results with others! 

Wednesday, 18 June 2014

Research Related Knick Knacks


This whole post is about some of the quirky things I encounter in and around doing research. Like this little guy to the left. A cute frog that hopped in front of me as I walked back from lunch one day. I scrambled to grab my phone out of pocket, and was surprised when the noise didn't startle it. In fact, it just sat there posing while I got close to take it's picture! This modelling frog just had to make it onto my blog one way or another!
Sometimes I actually do bench work, and don't just tromp around in marshes all day. As part of my project this summer I will be doing redox potential of the marsh. So I've been working my way through a large bin of redox electrodes, testing each one in a variety of solutions to test if the probe is still good. Here the probe is in a ferrous-ferric solution, which is bright orange. Next to the beaker is a pink pH 4 buffer solution, which I mix with hydroquinone to make another solution.

Then today I was evacuating exertainers, which are small vials for gas samples that we can then run on a gas chromatograph (GC) to see the methane concentration. I'll be taking methane flux measurements tomorrow, which is methane concentration over time to examine differences in vegetation in connection with methane emissions. Anyways, I digress (because science is fascinating!), getting back to the picture this gauge is attached to the vacuum which evacuates the exertainers. This sign started flashing up, being not 100% familiar with the device I asked a lab mate what it meant and he told me "bat stands for battery (as in low battery) or it's the batman signal, I'm not sure" Basically, my lab is awesome!

I'm usually not inside doing bench work, I'm usually out in the field in marshes. These two pictures are my two main field sites this summer. GCREW on the left and Fox Point on the right. They are both beautiful! I would not be excited to come to work each day, if I worked inside at a desk. I love being outside with nature, doing hands-on research!

 Sometimes I take friends out to the marsh with me. One day after work, I still had some work to do out in the marsh. Because honestly that 8:30am-4:30pm workday is non-existent! I work until it gets done, regardless of what hour it is. So Hope and I went out to GCREW at about 5:30pm one afternoon to lay down some fiberglass boardwalks over the muddy patches on the way to the methane flux plots. Hope is much more used to real, mucky marshes not the luxury electrified marsh of GCREW. The boardwalk at GCREW is elevated above the marsh, and meanders through the marsh, passing by each of the many experiments taking place out there. 
 
The other day, a big storm rolled through the marsh. There was some lightening, so we finished the boardwalk we were working on and took a break to watch the weather. Gary and I got up on the boardwalk in front of the porch to watch the lightening. We tried really hard to get a picture of the lightening flashing across the sky, but were unsuccessful! But my lab mate, also named Rachel (she's big Rachel and I'm little Rachel according to our lab!) got this great picture of the sky as the storm rolled across. It's amazing! The different cloud elevations and colors contrasted against the marsh is gorgeous!

White Chocolate Raspberry Cheesecake Cookies

Last semester, the Bryn Mawr track and field team had a cookie baking party. We chose a few recipes to bake. One of them was white chocolate raspberry cheesecake cookies! I loved that recipe so much that I decided to bake some here at SERC.

Ingredients
  • 2 cups all-purpose flour
  • ½ teaspoon salt
  • ½ teaspoon baking powder
  • ⅛ teaspoon baking soda
  • 10 tablespoons butter, softened
  • 1 cup white sugar
  • 4 ounces cream cheese, softened
  • 1 teaspoon vanilla extract
  • 1 egg, room temperature
  • 1 cup white chocolate chips, chopped
  • 1 cup frozen raspberries, chopped
Instructions
  1. Preheat oven to 375 degrees F.
  2. Combine dry ingredients in a medium bowl and set aside.
  3. In a large bowl cream together butter, cream cheese and sugar.
  4. Mix in egg and vanilla extract.
  5. Add dry ingredients into the wet ingredients until incorporated.
  6. Fold in white chocolate chips and frozen raspberries.
  7. Use a mini ice cream scoop and place cookies about 1-2 inches apart on a baking sheet lined with parchment paper.
  8. Bake for 7-8 minutes.
  9. Let cookies rest in hot pan for 2 minutes before removing to a cooling wrack to cool completely.
  10. Place cookies on a baking sheet and refrigerate until glaze is set.
  11. Store in the fridge.
There's an option for a cream cheese glaze on the original recipe, but I thought the cookies were delicious alone when I made them this spring. I made about 3 dozen this time around at SERC!
I love this recipe because the cookies are soft, fruity, and chocolaty - basically three things which alone are great, but together are wonderful!


Sunday, 15 June 2014

Plot Twist at the United States Capitol

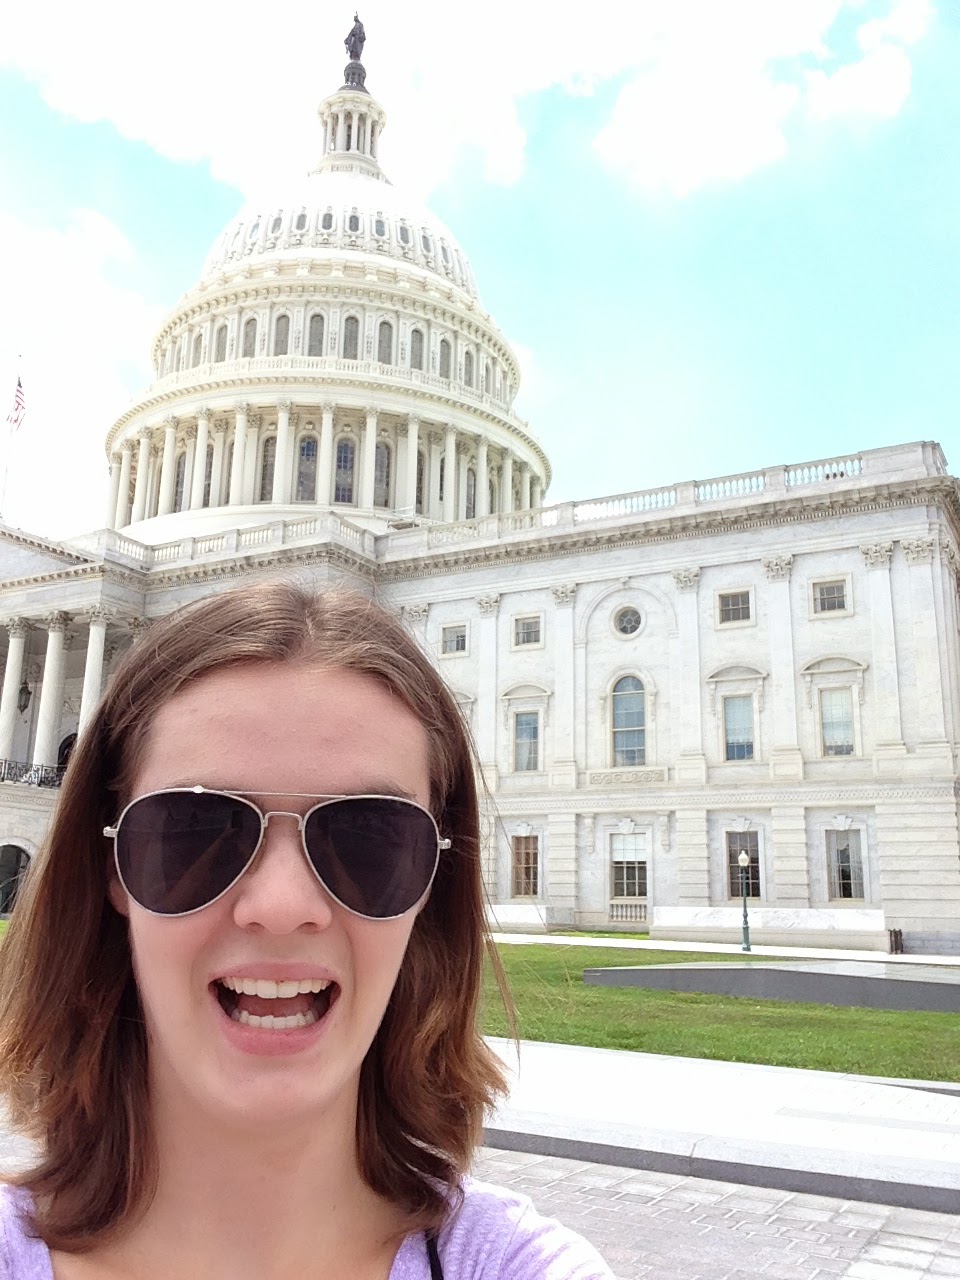
Being a tourist in the DC area means visiting the US capitol is necessary. I had actually never been when I was here last summer, so I was excited to make a stop when we were in DC last weekend. The capitol is at one end of the National Mall, the other end is the Lincoln Memorial with the Washington Monument just slightly west of center.


 We did the complete tourist thing, taking pictures as we walked around the Capitol. Even taking group selfies! We were all smiles in the beautiful sun! Absolutely no shame in being stereotypical tourists in our own country! 
As were walking down the stairs to the visitor center we heard yelling from security guards. There was an evacuation at the Capitol! We had no idea what was happening nor did anyone else, other than brisk orders to keep moving away from the Capitol. We found out later that a plane had gotten too close to the protected air space of the Capitol, so as a security measure the capitol was evacuated. 

Thus in an unexpected plot twist, I never got to go inside the Capitol, so we'll have to go back to take a tour of the inside, not just the outside!


United States Botanic Garden

Last weekend, a lot of the interns went into DC. Sometimes we take the metro in, but this time we drove in and parked up the Air and Space Museum, where as Smithsonian connected we can park for free, right next to the National Mall! It was a lovely day, sunny, warm, and a lovely blue sky! 

 We walked along the National Mall to reach the national botanic gardens. There were so many plants, which were split into different biomes like desert, tropical, etc. I took so many pictures! This is what happens when several interns at an environmental research center go to what could be called a plant museum.

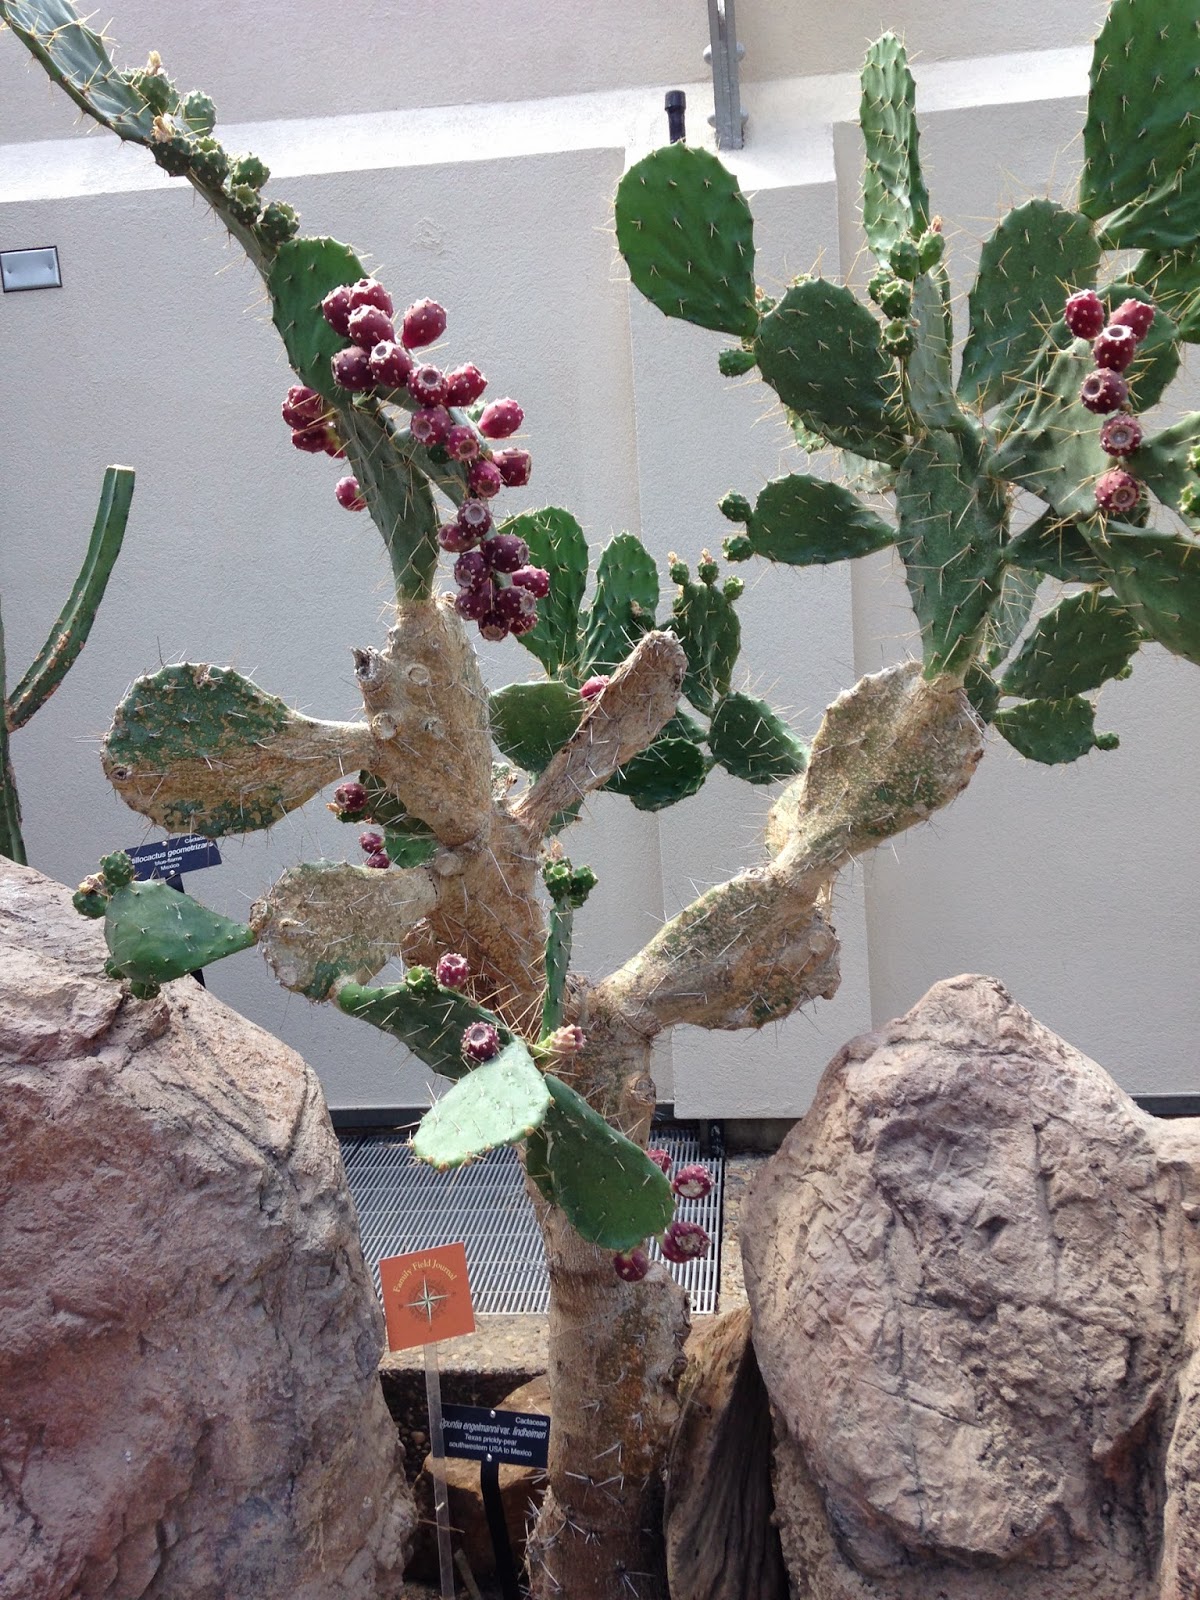
These two plants are from the desert room. Both can be found in Texas! I forget the name of the plant on the left with those beautiful pink flower, it is from Texas though. The one the right is a prickly pear cactus! The Texas state plant! Apparently its fruit is edible and delicious, in fact it was a main summer fruit for Native Americans.


After the desert room was the Hawaii room, which was small yet fascinating! Then was a room full of ferns! The picture on the left above is of a baby fern frond just starting to unroll. Plants are so awesome! And the video in the middle (which I hope works!) is me touching a frond of Minosa pudica, the sensitive fern. It is touch sensitive, folding in its leaflets when touched as a defense mechanism. It's not exactly known why it evolved with this mechanism. One explanation is that herbivores would rather eat a non-moving plant, than a more active one, while another explanation is that the quick movement would dislodge insects that could harm the plant.  


Next to the inside museum section (the conservatory) is an outside garden (technically the official national garden) with many sections including a mid-Atlantic regional garden, a rose garden, a butterfly garden, the first ladies water garden, and a rain garden.


It was a great place to explore for the afternoon. And look there's an owl mosaic in the entry way of the conservatory!


Saturday, 14 June 2014

Chocolate & Raspberry Roulade

I have a baking book I got this winter at thrift store in Bryn Mawr. I love just looking through it because it has gorgeous pictures of desserts, but when I have a kitchen and time I find a recipe in the book and give it a try. Last week I decided to try the chocolate & coconut roulade, my roommate is allergic to coconut though. So I made a few edits to make it into a chocolate & raspberry roulade!

Traditionally roulades were made with meat wrapped around vegetables or other savory foods. But it has developed into a sweet dessert with cake wrapped around a filling. This roulade has a dark chocolate coating! I think the hardest part was waiting for the chocolate to cool and harden before eating it. But to pass the time while we waited, the interns had lots of delicious fun scrapping the chocolate out of the saucepan after I had covered the cake.

Here's how to make a chocolate & raspberry roulade!
Ingredients:
For the cake
- 3 eggs
- 1/2 cup superfine sugar
- 1/2 cup of self-raising flour (though I admit I only had baking flour not self-raising so my cake was not as fluffy and bouncy as it should have been!)
- 1 tbsp butter
- 6 tbsp raspberry conserve
For the chocolate coating
- 7 oz dark chocolate
- 1/4 cup butter
- 2 tbsp light corn syrup

Directions
1) Grease and line a 9x12 inch pan. Whisk the eggs and superfine sugar  and butter in a large mixing bowl with electric beaters for about 10 minutes or until the mixture is very light and foamy and the whisk leaves a trail when lifted.
2) Sift the flour and fold in with a metal spoon or a spatula. Pour into the prepared pan and bake in a preheated oven, at 400F for 10-12 minutes, or until springy to the touch.
3) Sprinkle a sheet of baking parchment with a little superfine sugar. Turn the cake out on to the paper and carefully flip the cake onto the paper and carefully peel away the lining paper (it's harder than you think.) Spread the jam over the sponge cake and roll up from the short end. Let sit on a rack to cool.
4) To make the chocolate coating, melt the chocolate and butter, stir while adding teh corn syrup. Leav cool for 5 minutes. Spread it over the roulade and leave to set. Cut the roulade into slices and serve.

You could also serve it with a raspberry coulis, made out of pureed raspberries, water, and sugar, then strained to remove the seeds. Next time I would make it with self-raising flour. I'd love to try it with the creamed coconut and shredded coconut in the sponge cake itself. It would give it an interesting texture and flavor. It's a sweet and delicious sponge cake with raspberry filling, encased in a rich chocolate coating. I made a whole roll which was gone in a night, honestly in a few hours.